Insect bot
De Wikidebrouillard.
Sommaire |
Présentation du projet Insectbot
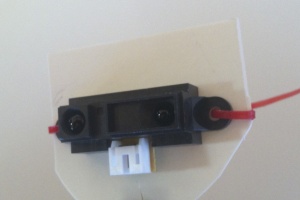
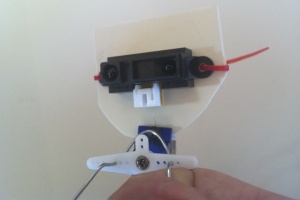
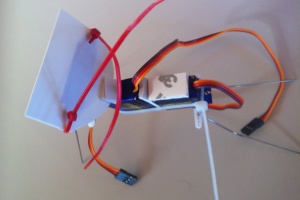
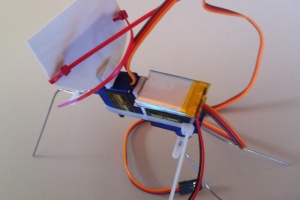
Robot électromécanique autonome avec senseur/capteur infrarouge pour évitement d'obstacles, à monter en kit. Créer en Chine par Lutz Michaelis, sur cet atelier nous utilisons la version distribué par DFRobot. [1] [2]
Robot électromécanique autonome avec senseur infrarouge pour évitement d'obstacles, à monter en kit. Créer en Chine par Lutz Michaelis, sur cet atelier nous utilisons la version distribué par DFRobot. [3] [4]
Animateur:
Habib [5]
Participants:
Jour 1 : Claude, Thierry, Igor, Olivier, Yvan
Jour 2 : Rachel, Charlotte, Alice, Moosh
Liste du matériel
DIY Kit Insectbot Mini
Les références indiqués sont celles du vendeur DFRobot
-
 1x Carte DFRobot Beetle Arduino
-
 1x Carte DFRobot Beetle Shield v0.4
-
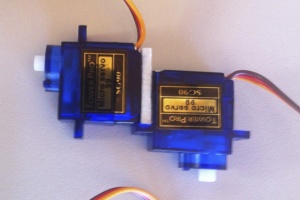
 2x Micro Servomoteur SG90 (ref:SER006)
- 1x Senseur Infrarouge Sharp 2YOPA21 (ref:SEN0014)
- 1x Batterie LiPo 3.7V/180mAh avec un chargeur USB
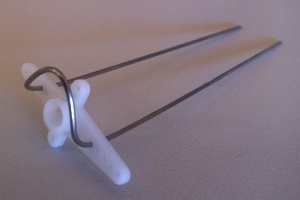
- 2x Tiges Acier 200mm x 1mm
- 1x Feuille de plastique de 50 x 50mm
- 1x scotch double face 40x30mm
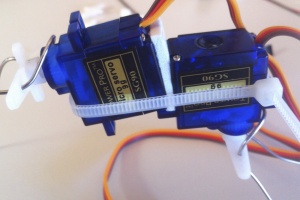
- 5x colliers serflex 100mm
- 1x collier serflex 200mm
-

 Un ordinateur et le logiciel Arduino pour charger le programme
Réalisation du projet
Assemblage
/* ♥ LE GROUPE DES FILLES REMPLIE ICI ♥ */
Guide de montage : http://www.instructables.com/id/Insect-Bot-mini/
Observations/Erreurs à ne pas faire :
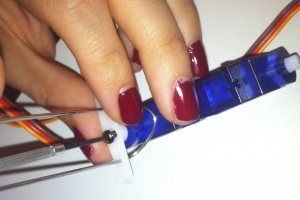
[graoulab] : il faut faire attention en pliant les pattes. Les tiges sont pointues et rentrent facilement dans les doigts.
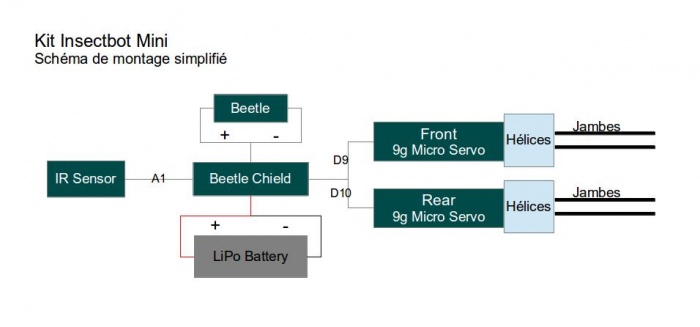
Schéma
Chargement du programme
[Image ordinateur logiciel Arduino relier en USB au robot]
Le programme : http://www.instructables.com/files/orig/FZN/1FYV/HP0CIEUH/FZN1FYVHP0CIEUH.rar
Code
// /////////////////////////////////////////////////////////////////
// INSECT BOT MINI                                                //
//                                                                //
// modified by Lumi for DFRobot.com                               //
// 2013/10/26                                                     //
////////////////////////////////////////////////////////////////////

// Servo Library
#include <Servo.h>
// Servo name
Servo frontServo;
Servo rearServo;
// time delay between steps
int walkSpeed = 500;
// center servos
int centerPos = 90;
// servo angles for walking pattern
int frontRightUp = 70;
int frontLeftUp = 110;
int backRightForward = 70;
int backLeftForward = 110;
// another center position
int centerTurnPos = 81;
// servo angles for walking pattern
int frontTurnRightUp = 70;
int frontTurnLeftUp = 110;
int backTurnRightForward = 70;
int backTurnLeftForward = 110;
// variable for distance value
int distance = 0;
// average distance value
int distanceCheck = 0;
// Array for distance values
int collectDistance[5];
// Variables for counters
int i;
int f;
int r;
// assign analog pin A1
int sensorPin = A1;
// distance value for danger close. Bigger values are greater distance and smaller values are lower distance
int dangerDistance = 350;
/* Setup function */
void setup()
{
// attach servos
  frontServo.attach(9);
  rearServo.attach(10);
  // assign sensor
  pinMode(sensorPin, INPUT);
  // center servos
  frontServo.write(centerPos);
  rearServo.write(centerPos);
  // wait 3 seconds for start walking
  delay(3000);
  //Serial.begin(9600); // serial data setup
}
/* distance check function */
void scan()
{
	// read 5 distance values
            for (i = 0; i < 5; i = i + 1) {
		distanceCheck = analogRead(sensorPin);
		collectDistance[i] = distanceCheck;
		// serial output for testing
                //Serial.print (i);
                //Serial.print(" = ");
		//Serial.println(collectDistance[i]);
	    }
      // checksum of the 5 distance values for getting an average value. This will prevent the robot to change behavior by reading one wrong value
      distance = (collectDistance[0]+collectDistance[1]+collectDistance[2]+collectDistance[3]+collectDistance[4])/5;
      delay(20);
}
// walk forward
void moveForward()
{
  // loop for the servo angels to smoothen the steps
  for (f = 0; f < 39; f++){
   frontRightUp++;
   backLeftForward--;
   frontServo.write(frontRightUp);
   rearServo.write(backLeftForward);
   delay(10);
  }
  // loop for the servo angels to smoothen the steps
  for (r = 0; r < 39; r++){
   frontRightUp--;
   backLeftForward++;
   frontServo.write(frontRightUp);
   rearServo.write(backLeftForward);
   delay(10);
  }
}
// walk backwards to the left
void moveBackRight()
{
frontServo.write(frontRightUp);
rearServo.write(backRightForward-6);
delay(110);
frontServo.write(centerPos);
rearServo.write(centerPos-6);
delay(80);
frontServo.write(frontLeftUp+9);
rearServo.write(backLeftForward-6);
delay(110);
frontServo.write(centerPos);
rearServo.write(centerPos);
delay(80);
}
// walk forward to the left
void moveTurnLeft()
{
frontServo.write(frontTurnRightUp);
rearServo.write(backTurnLeftForward);
delay(110);
frontServo.write(centerTurnPos);
rearServo.write(centerTurnPos);
delay(80);
frontServo.write(frontTurnLeftUp);
rearServo.write(backTurnRightForward);
delay(110);
frontServo.write(centerTurnPos);
rearServo.write(centerTurnPos);
delay(80);
}
// blink LED. This function can be called in any situation you want. Just add led(); in the code where you want to blink the LED.
void led(){
  // loop for the LED to blink it 5 times for 0.05 sec on and 0.1 sec off
    for(int l=0; l<=5; l++) {
      digitalWrite(13, HIGH);
      delay(50);
      digitalWrite(13, LOW);
      delay(100);
    }
}
// that's the loop. This is repeatedly called as long as the robot is powered on
void loop()
{
  // call function for checking the distance
  scan();
  //Serial.println(distance);
    if (distance > 1){ // filters out the zero readings
    // an obstacle is being detected
    if (distance > dangerDistance) {
      // LED at Pin 13 (standard) blinks 5x
      led();
        // 4 steps backward left
        for(int i=0; i<=3; i++) {
        moveBackRight();
        delay(walkSpeed);
    }
      // 4 steps forward left
      for(int i=0; i<=3; i++) {
      moveTurnLeft();
      delay(walkSpeed);
    }
    } else {
      // all clear, no obstacle detected. Just walk forward
      moveForward();
        delay(walkSpeed/100);
    }
    }
}
Liens avec d'autres projets arduino
chercher ici : http://wikidebrouillard.org/index.php/Catégorie:Arduino
http://wikidebrouillard.org/index.php/Robot_autonome_de_type_Roomba
http://wikidebrouillard.org/index.php/Robot_%C3%A9lectro-m%C3%A9canique
http://wikidebrouillard.org/index.php/Capteur_de_pr%C3%A9sence
Pour aller plus loin
Journee Graoulab
Vendredi 8 Août 2014, Metz, Lorraine, France www.graoulab.org
6 insectes construits
5 marchent normalement et un autre a des soucis avec le capteur. L'atelier est ludique c'est drôle. C'est compliqué mais on apprend plein de nouvelles choses. Attention à la tête, elle penche et casse(support en plastique blanc). L'animation de l'atelier couvre toutes les étapes et devient une excellente base pour poursuivre.
Liens avec le quotidien
quelles peuvent être les applications technologiques de ce montage, ou est-ce qu'on retrouve des programmes qui y ressemble ?
