Grove : Capteur d'électricité
De Wikidebrouillard.
(Page créée avec « == Introduction == The Electricity sensor module is a member of Grove. It is based on the TA12-200 current transformer which can transform the large AC into small amplitu… »)
Modification suivante →
Version du 22 octobre 2013 à 12:38
Sommaire |
Introduction
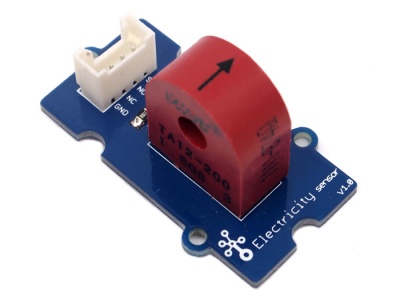
The Electricity sensor module is a member of Grove. It is based on the TA12-200 current transformer which can transform the large AC into small amplitude. You can use it to test large alternating current up to 5A.
Model:SEN23931P
Features
- Grove compatible interface
- Maximum 5A input
- High accuracy
- Small size
Application Ideas
- Alternating current measurment
- Device condition monitoring
Specification
Key Specification
| Items | Min |
| PCB Size | 2.0cm*4.0cm |
| Interface | 2.0mm pitch pin header |
| IO Structure | SIG,NC,NC,GND |
| ROHS | YES |
Electronic Characterstics
| Items | Min | Norm | Max | Unit |
| Transformation ratio | - | 2000:1 | - | - |
| Input Current | 0 | - | 5 | A |
| Output Current | 0 | - | 2.5 | mA |
| Sampling Resistance | - | 800 | - | Ω |
| Sampling Voltage | 0 | - | 2 | V |
| Working Frenquency | 20 | - | 20K | HZ |
| Nonlinear scale | - | - | 0.2% | - |
| Phase Shift | - | - | 5' | - |
| Operating Temperature | -55 | - | 85 | ℃ |
| Dielectric strength | - | 6 | - | KVAC/1min |
Usage
The following sketch demonstrates a simple application of measuring the amplitude of the alternating voltage.The SIG pin will output a alternating voltage based on the alternating current being measured. You can measure the value using ADC.
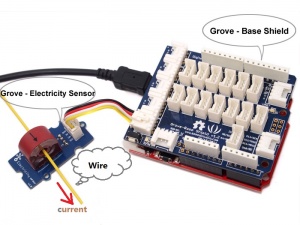
- Connect the module to the analog A0 of Grove - Base board
- Put the alternating current wire through the hole of the current transformer.
- Copy and paste code below to a new Arduino sketch.
/****************************************************************************/
//	Function: Measure the amplitude current of the alternating current and
//			  the effective current of the sinusoidal alternating current.
//	Hardware: Grove - Electricity Sensor
//	Date: 	 Jan 19,2013
//	by www.seeedstudio.com
#define ELECTRICITY_SENSOR A0 // Analog input pin that sensor is attached to

float amplitude_current;               //amplitude current
float effective_value;       //effective current

void setup()
{
	Serial.begin(9600);
	pins_init();
}
void loop()
{
	int sensor_max;
	sensor_max = getMaxValue();
	Serial.print("sensor_max = ");
	Serial.println(sensor_max);
	//the VCC on the Grove interface of the sensor is 5v
	amplitude_current=(float)sensor_max/1024*5/800*2000000;
	effective_value=amplitude_current/1.414;//minimum_current=1/1024*5/800*2000000/1.414=8.6(mA)
						//Only for sinusoidal alternating current
	Serial.println("The amplitude of the current is(in mA)");
	Serial.println(amplitude_current,1);//Only one number after the decimal point
	Serial.println("The effective value of the current is(in mA)");
	Serial.println(effective_value,1);
}
void pins_init()
{
	pinMode(ELECTRICITY_SENSOR, INPUT);
}
/*Function: Sample for 1000ms and get the maximum value from the SIG pin*/
int getMaxValue()
{
	int sensorValue;             //value read from the sensor
	int sensorMax = 0;
	uint32_t start_time = millis();
	while((millis()-start_time) < 1000)//sample for 1000ms
	{
		sensorValue = analogRead(ELECTRICITY_SENSOR);
		if (sensorValue > sensorMax)
		{
			/*record the maximum sensor value*/
			sensorMax = sensorValue;
		}
	}
	return sensorMax;
}
- Upload the code, please click here if you do not know how to upload.
Note: The minimum effective current that can be sensed by the code can be calculated using the equation below.
minimum_current=1/1024*5/800*2000000/1.414=8.6(mA).
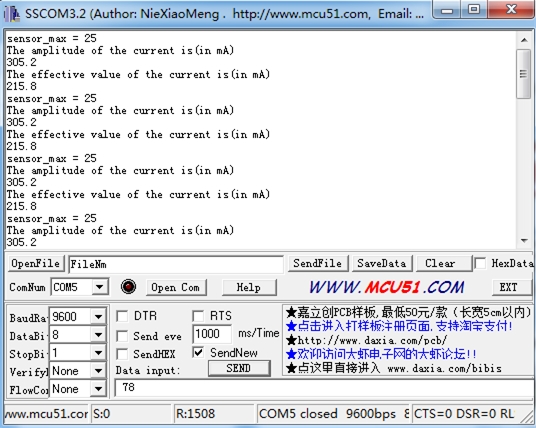
- Open the serial monitor, The results is as follows:
Resources
Support
If you have questions or other better design ideas, you can go to our forum or wish to discuss.
Crédits
Cette page est la traduction de celle-ci : http://www.seeedstudio.com/wiki/index.php?title=Twig_-_Electricity_Sensor
Traducteurs : machine et bidule - 2013 dans le cadre de Master 2 rédacteur traducteur 2013


