Insect bot
De Wikidebrouillard.
(→Assemblage) |
(→Assemblage) |
||
| Ligne 62 : | Ligne 62 : | ||
Guide de montage : http://www.instructables.com/id/Insect-Bot-mini/ | Guide de montage : http://www.instructables.com/id/Insect-Bot-mini/ | ||
| - | [[Image:Arduino_Insectbot_Tuto_01.jpg| | + | |
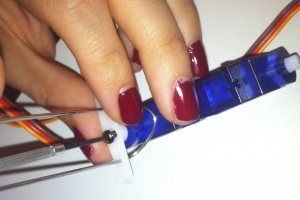
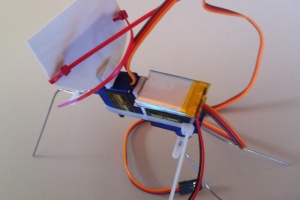
| - | [[Image:Arduino_Insectbot_Tuto_02.jpg| | + | [[Image:Arduino_Insectbot_Tuto_01.jpg|300px]] |
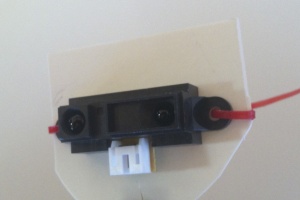
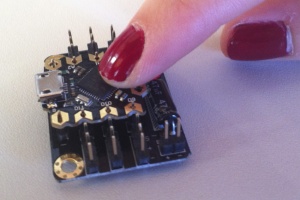
| - | [[Image:Arduino_Insectbot_Tuto_03.jpg| | + | [[Image:Arduino_Insectbot_Tuto_02.jpg|300px]] |
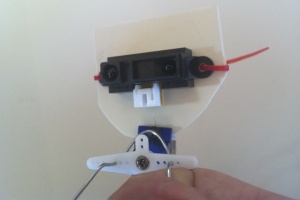
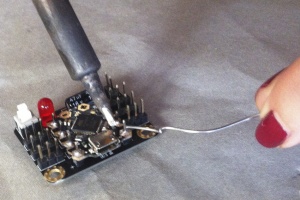
| - | [[Image:Arduino_Insectbot_Tuto_04.jpg| | + | [[Image:Arduino_Insectbot_Tuto_03.jpg|300px]] |
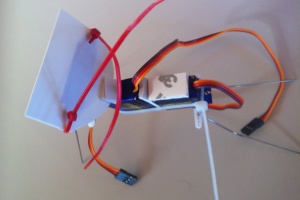
| - | [[Image:Arduino_Insectbot_Tuto_05.jpg| | + | [[Image:Arduino_Insectbot_Tuto_04.jpg|300px]] |
| - | [[Image:Arduino_Insectbot_Tuto_06.jpg| | + | [[Image:Arduino_Insectbot_Tuto_05.jpg|300px]] |
| - | [[Image:Arduino_Insectbot_Tuto_07.jpg| | + | [[Image:Arduino_Insectbot_Tuto_06.jpg|300px]] |
| - | [[Image:Arduino_Insectbot_Tuto_08.jpg| | + | [[Image:Arduino_Insectbot_Tuto_07.jpg|300px]] |
| - | [[Image:Arduino_Insectbot_Tuto_09.jpg| | + | [[Image:Arduino_Insectbot_Tuto_08.jpg|300px]] |
| - | [[Image:Arduino_Insectbot_Tuto_10.jpg| | + | [[Image:Arduino_Insectbot_Tuto_09.jpg|300px]] |
| + | [[Image:Arduino_Insectbot_Tuto_10.jpg|300px]] | ||
Observations/Erreurs à ne pas faire : | Observations/Erreurs à ne pas faire : | ||
Version du 4 juillet 2014 à 20:25
Sommaire |
Présentation du projet Insectbot
Robot électromécanique autonome avec senseur/capteur infrarouge pour évitement d'obstacles, à monter en kit. Créer en Chine par Lutz Michaelis, sur cet atelier nous utilisons la version distribué par DFRobot. [1] [2]
Robot électromécanique autonome avec senseur infrarouge pour évitement d'obstacles, à monter en kit. Créer en Chine par Lutz Michaelis, sur cet atelier nous utilisons la version distribué par DFRobot. [3] [4]
Animateur:
Habib [5]
Participants:
Jour 1 : Claude, Thierry, Igor, Olivier, Yvan
Jour 2 : Rachel, Charlotte, Alice, Moosh
Liste du matériel
DIY Kit Insectbot Mini
Les références indiqués sont celles du vendeur DFRobot
-
 1x Carte DFRobot Beetle Arduino
-
 1x Carte DFRobot Beetle Shield v0.4
-
 2x Micro Servomoteur SG90 (ref:SER006)
- 1x Senseur Infrarouge Sharp 2YOPA21 (ref:SEN0014)
- 1x Batterie LiPo 3.7V/180mAh avec un chargeur USB
- 2x Tiges Acier 200mm x 1mm
- 1x Feuille de plastique de 50 x 50mm
- 1x scotch double face 40x30mm
- 5x colliers serflex 100mm
- 1x collier serflex 200mm
-

 Un ordinateur et le logiciel Arduino pour charger le programme
Réalisation du projet
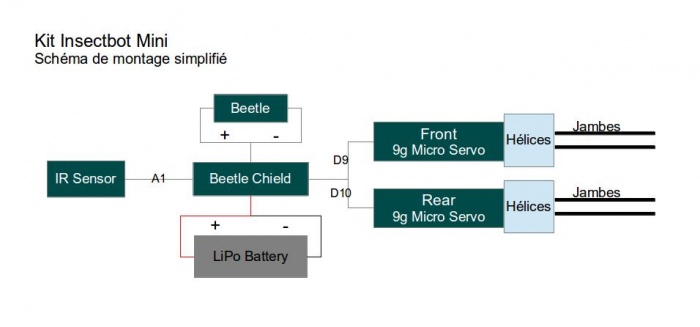
Schéma
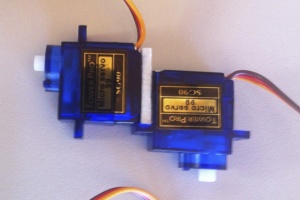
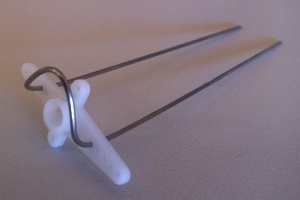
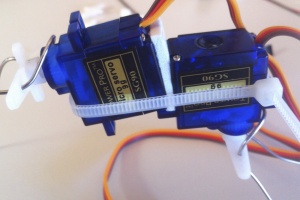
Assemblage
/* ♥ LE GROUPE DES FILLES REMPLIE ICI ♥ */
Guide de montage : http://www.instructables.com/id/Insect-Bot-mini/
Observations/Erreurs à ne pas faire :
Chargement du programme
[Image ordinateur logiciel Arduino relier en USB au robot]
Le programme : http://www.instructables.com/files/orig/FZN/1FYV/HP0CIEUH/FZN1FYVHP0CIEUH.rar
Code
// /////////////////////////////////////////////////////////////////
// INSECT BOT MINI                                                //
//                                                                //
// modified by Lumi for DFRobot.com                               //
// 2013/10/26                                                     //
////////////////////////////////////////////////////////////////////

// Servo Library
#include <Servo.h>
// Servo name
Servo frontServo;
Servo rearServo;
// time delay between steps
int walkSpeed = 500;
// center servos
int centerPos = 90;
// servo angles for walking pattern
int frontRightUp = 70;
int frontLeftUp = 110;
int backRightForward = 70;
int backLeftForward = 110;
// another center position
int centerTurnPos = 81;
// servo angles for walking pattern
int frontTurnRightUp = 70;
int frontTurnLeftUp = 110;
int backTurnRightForward = 70;
int backTurnLeftForward = 110;
// variable for distance value
int distance = 0;
// average distance value
int distanceCheck = 0;
// Array for distance values
int collectDistance[5];
// Variables for counters
int i;
int f;
int r;
// assign analog pin A1
int sensorPin = A1;
// distance value for danger close. Bigger values are greater distance and smaller values are lower distance
int dangerDistance = 350;
/* Setup function */
void setup()
{
// attach servos
  frontServo.attach(9);
  rearServo.attach(10);
  // assign sensor
  pinMode(sensorPin, INPUT);
  // center servos
  frontServo.write(centerPos);
  rearServo.write(centerPos);
  // wait 3 seconds for start walking
  delay(3000);
  //Serial.begin(9600); // serial data setup
}
/* distance check function */
void scan()
{
	// read 5 distance values
            for (i = 0; i < 5; i = i + 1) {
		distanceCheck = analogRead(sensorPin);
		collectDistance[i] = distanceCheck;
		// serial output for testing
                //Serial.print (i);
                //Serial.print(" = ");
		//Serial.println(collectDistance[i]);
	    }
      // checksum of the 5 distance values for getting an average value. This will prevent the robot to change behavior by reading one wrong value
      distance = (collectDistance[0]+collectDistance[1]+collectDistance[2]+collectDistance[3]+collectDistance[4])/5;
      delay(20);
}
// walk forward
void moveForward()
{
  // loop for the servo angels to smoothen the steps
  for (f = 0; f < 39; f++){
   frontRightUp++;
   backLeftForward--;
   frontServo.write(frontRightUp);
   rearServo.write(backLeftForward);
   delay(10);
  }
  // loop for the servo angels to smoothen the steps
  for (r = 0; r < 39; r++){
   frontRightUp--;
   backLeftForward++;
   frontServo.write(frontRightUp);
   rearServo.write(backLeftForward);
   delay(10);
  }
}
// walk backwards to the left
void moveBackRight()
{
frontServo.write(frontRightUp);
rearServo.write(backRightForward-6);
delay(110);
frontServo.write(centerPos);
rearServo.write(centerPos-6);
delay(80);
frontServo.write(frontLeftUp+9);
rearServo.write(backLeftForward-6);
delay(110);
frontServo.write(centerPos);
rearServo.write(centerPos);
delay(80);
}
// walk forward to the left
void moveTurnLeft()
{
frontServo.write(frontTurnRightUp);
rearServo.write(backTurnLeftForward);
delay(110);
frontServo.write(centerTurnPos);
rearServo.write(centerTurnPos);
delay(80);
frontServo.write(frontTurnLeftUp);
rearServo.write(backTurnRightForward);
delay(110);
frontServo.write(centerTurnPos);
rearServo.write(centerTurnPos);
delay(80);
}
// blink LED. This function can be called in any situation you want. Just add led(); in the code where you want to blink the LED.
void led(){
  // loop for the LED to blink it 5 times for 0.05 sec on and 0.1 sec off
    for(int l=0; l<=5; l++) {
      digitalWrite(13, HIGH);
      delay(50);
      digitalWrite(13, LOW);
      delay(100);
    }
}
// that's the loop. This is repeatedly called as long as the robot is powered on
void loop()
{
  // call function for checking the distance
  scan();
  //Serial.println(distance);
    if (distance > 1){ // filters out the zero readings
    // an obstacle is being detected
    if (distance > dangerDistance) {
      // LED at Pin 13 (standard) blinks 5x
      led();
        // 4 steps backward left
        for(int i=0; i<=3; i++) {
        moveBackRight();
        delay(walkSpeed);
    }
      // 4 steps forward left
      for(int i=0; i<=3; i++) {
      moveTurnLeft();
      delay(walkSpeed);
    }
    } else {
      // all clear, no obstacle detected. Just walk forward
      moveForward();
        delay(walkSpeed/100);
    }
    }
}
Liens avec d'autres projets arduino
chercher ici : http://wikidebrouillard.org/index.php/Catégorie:Arduino
http://wikidebrouillard.org/index.php/Robot_autonome_de_type_Roomba
http://wikidebrouillard.org/index.php/Robot_%C3%A9lectro-m%C3%A9canique
http://wikidebrouillard.org/index.php/Capteur_de_pr%C3%A9sence
Pour aller plus loin
Liens avec le quotidien
quelles peuvent être les applications technologiques de ce montage, ou est-ce qu'on retrouve des programmes qui y ressemble ?
